Wednesday, June 29, 2011

You're Out of this World.... Scrappy Mom's Stamps

Here is another 4"x4" card with buttons that I made for--- Ms. Marlene. She is "out of this world" with all those free images she gives us.  What??? You don't know about her FREE Images?  Go over to www.disguisedasagrownup.blogspot.com.   She posts free digi-images but you need to collect them within 24 hours.  
They're AWESOME!!!!
Anywhoo.... I had used an EK Success punch on the front of the card for the blue and pink border as well as a Scrappy Mom's sentiment that says "You're Out of this World!"  Aren't these buttons cute??? They're at Michaels!!!! Just clip the ring off the back with wire cutters.


Spellbinders Nestabilities "Standard Circles"


Tuesday, June 28, 2011

It's ALIVE!!!

I am so proud of myself.  I fixed my tv.  Well, let's put it this way, ... I got my tv to work again. I have a HUGE tv that (before my iPhone) was the best thing in my life (that didn't have a heartbeat and anal glands). The audio/picture was going out after 45 seconds and coming back on after 45 seconds or so.  I ordered a lightbulb (thank you Amazon) and painfully followed the instructions (after driving twice to my dad's house to get the proper hex screw and wide screwdriver to unscrew some of the components)... and voila!  It works again... for now. Despite having the instructions, this was not a simple task for me.  Never underestimate the skills of a woman who REALLY WANTS HER TV TO WORK!  :)   
I did some research and I hope that fixes it.  I say this because some of the feedback on the internet said that even after the changing of the lightbulb, some tv's went back to their nasty habits.

Needless to say, I didn't get any crafting done because I was trying to bring my tv back to life....

This is an old photo of Sam when he first came to live with us and caught Animal Planet on the tv. 


A Friend...

I got this stamp at Joann's.  I don't normally buy a wood block stamp but I really liked the sentiment on this one.
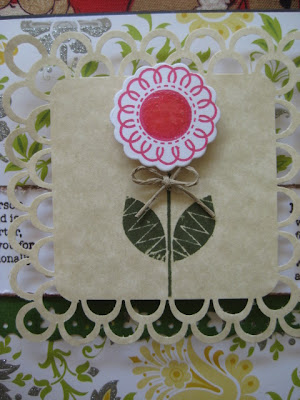
I used my Martha Stewart's Punch around the page and Paper Trey Ink's Flower Fusion and some chalk ink (a la Mary at Cardztv).  I also used a MS Punch on the green border.


 Spellbinders Nestabilities was the die cut and embossing image I used

Monday, June 27, 2011

NEW BABY

One of my friends is having a baby.  Here is a card I made for the expecting couple.
The background is a series of Stampin' Up stamps that I did on 2 layers of white cardstock (to make them thick).  I then distressed them with a Tim Holtz Distresser/(razor) to make them look frayed, like a quilt.  I then glued them on pink cardstock.  The image was colored with Copics and I did put Stickles on the hair barettes.  I also put Glossy Accents on the water in the toilet. I added some Liquid Pearls on the bathwater on one of the bottom left square.  I took a silver pen and colored the toilet handle as well (snicker).


This is a Paper Trey Ink die cut and stamp. 


***Did you check out that new little button on my blog's top right corner. Yup! Isn't that a cute image of Marlene????  I believe Sassy Cheryl did it and she is one of my favorite image creators!!!!!.

Sunday, June 26, 2011

DOG GONE IT... Thank you

Here's a simple THANK YOU card (4"x4") that I made using a hot glue gun and buttons that you can get at Michaels (I clipped the ring off the back with wire cutters).  The inside stamp is from PAPER TREY INK and I also used a Spellbinders Nestability to put the sentiment on it.


White embossing powder was done on the sentiment with some brads from Michaels.
 
Publish Post

Saturday, June 25, 2011

My First (Almost) Quilt

Today, Judy taught me how to make a quilt.  I have only done part of it but here it is...


Supplies:  1 yard of the red fabric, 1 yard of the white fabric, and 2 yards of the black/silver fabric
I cut the red fabric (using a Rotary Cutter and an acrylic ruler) into 6 4.5" x 4.5" squares.  I cut the white fabric into 12 9" x 9" squares.  I cut the black border into 17 9" x 4.5" rectangular squares. 

After cutting, I lined up the first horizontal row and sewed each panel to the next with a straight stitch.  I then lined up the next row.  When all the horizontal rows were done, I had 7 horizontal strips (4 with the white fabric) and 3 with the black and red fabric.  I ironed those and lined the first & second row up with pins and sewed the first rows together. I then ironed and  pressed again and sewed the third row to the second row... and so on and so on... Until it looks like the above.

My next task is to cut a 5" vertical border and 5" horizontal border of the black/silver fabric and sew those to the pre-quilt, photo'd above.  Stay tune for the next photo....

Note:
I learned it was very very important to be exact on the measurements when cutting the fabric.  Also, I learned it is very important to "press" the fabric (IRON it) before sewing and as you are sewing your project.  I never realized the role an iron plays in sewing.  

Here is a pattern to help explain what I'm doing. The fabric is just fabric I got at Joann's.  The drawn pattern below is not to size as you can see by that last row that is too big.


Thursday, June 23, 2011

Witchy-Poo

Look at this fabulous project that my sewing teacher, Judy, is doing a workshop on.

The face and fingers are painted on to the green canvas.  I won't be taking this class as it is too much creativity for my brain to handle but I thought I'd share with you her wonderful creation. In the background, you can see all the fabulous quilts people have made.  


If you scroll down a bit, you'll see Marlene from www.disguisedasagrownup.blogspot.com.  Marlene is so awesome, and if you haven't been going there, you're missing on some great FREE digi's that she has created. Anyway, there's a Q&A with Marlene and she is on FIRE!  
On another aside, DudeTimeDoodles features some great digi images that I LOVE that you can buy... so it would be a great place to go just to see some AWESOME digis.

Seriously, I love Marlene (and Tammy, and Jeni, and Viv, and Mary and so many others....).  I love to advertise their blogs because they are inspirational!!!!   I'm a total groupie to these ladies (but I don't stalk....  I repeat (FOR THE AUTHORITIES)  I DO NOT STALK!!!   )
I'm glad to see that Marlene is showcased in all her gassy glory!  (inside joke for those of you who don't know Marlene.)  

Thank you Tammy (click to go to her super blog to see great cards) for the 4-1-1 on Marlooney!!! :)

I have no more cards until the weekend so go see Tammy and Marlene and Mary and Jeni.  And stay tuned for possibly another sewing project.  (Class is Saturday so let's see what Judy has in store for me). 

Hugs and kisses!!!!

Wednesday, June 22, 2011

Happy Father's Day card

Here is the real Father's Day card that I just dropped off at my dad's (Tuesday night).  

I got the idea from Mary  over at Cardztv.   The background is a Stampin' Up background stamp of polka dots that I used UTEE on.  The shirt?  Well, check out Mary's video on how to make it. She's great at explaining stuff.  The sentiment came from my computer.


On a side note, my Paper Trey Ink order is due in to arrive by Saturday!!! Let's see what I can make with that stuff (OR NOT!).  I occasionally buy things and don't use them... for a while.  Ie, my Cricut Lite carts (Block Party and Hoot n Holler).  I'm now looking for 4-Legged Friends.  I don't think Walmart is carrying it anymore.


Tuesday, June 21, 2011

French Memo Board

I have a handful of cards that came from some of my friends here in this blogging community. I like to keep them up where I can have them displayed for inspiration.  I decided (after seeing Mary's French Memo board in her NEW RECORDING STUDIO), that I would make one as well.  Mine is much smaller but I put up a few cards from my dear friends.  I will have to find other areas in my scrap-cave for the other ones.  Fabric and ribbon came from Joanns.  I got the instructions from a YouTube Video  (at Karlee's blog ).  

Note: I did use some brads that I got at Michaels. This corkboard was purchased at Wal-Mart (14"x14").


Monday, June 20, 2011

My 3rd Sewing Project.... an Apron

Here is the apron I made (with a lot of assistance from my sewing teacher, Judy).  We used a pattern of hers and I did the sewing, however she helped me create an even 'ruffle' at the bottom of the apron.  Granted, this apron isn't for me. I don't use aprons... because microwaving food is not considered cooking (haha!).  Those are ladybugs on the fabric.


Sunday, June 19, 2011

Father's Day Card

I've been working on some sewing projects and craft projects...  :(  I'll share those with you in the week.

Here's my Father's Day card... that I forgot to drop off at my Father's...
I don't have a Father's Day stamp but this stamp from Paper Trey Ink did nicely.
The punch is from Martha Stewart's Punch around the page.


Tuesday, June 14, 2011

I'm back....

for a bit. I have been busy with work, sewing, an Angels' game, organizing the house,....

So, if you forgot what I looked like, here I am in my work attire....

And here is my scrapping room (I still need to put up my rails for my punches that are laid out on the table)....

The cubby on the left is Home Depot's Martha Stewart. The cubby on the right is from Target and on clearance.  The TV will be moved out soon... to allow for another cubby.  The stuff to the left is my sewing material. My sewing machine on the top of my cubby with all my sewing supplies.  My 12x12 paper is on the bottom right in a couple storage container.

My 'scrap' paper is under the AirWalk Box,mailing boxes next to them, Airwalk box contains digi images to be colored

More 12x12 paper is behind the laptop, below my Sam Winchester calendar (thanks L!). Check out my Brian Lock book (behind the lamp!)

I have some punches behind the door but plan to move those, and another Target storage cubby holds a lot of embossing, Cricut Carts, extra glue, etc.... My expression is under the Ikea (red/white) pillowcase.

I hope to make cards by this weekend.  I am also reading a FABULOUS book called THE PASSAGE.  I didn't know if I'd like it but OMG! I thoroughly enjoy it.   I will be back though now that I've gotten a lot of the house stuff done.


Monday, June 6, 2011

A LITTLE ABSENT IN THE HEAD

Hi everyone....
For my 5 followers out there (haha- and YOU KNOW WHO YOU ARE!!!)... I'm doing a lot of cleaning and organizing at my house so I'm going to be kinda quiet for a couple weeks. I'm re-organizing my scrap room, and 2 other bedrooms... AND trying to clean this house out of all the stuff I've been saving for the past 10 years.  My scrap room looks a bit better but there is still stuff all over the place from the other rooms.  

I have a hard enough time creating a card but it is definitely madness here.


Anyway, hang in there... and go visit Marlene, Tammy, Jeni, and Viv... AND of course Mary and Christina (for videos).... 

I hope that I will soon be able to film the chinchillas and make more videos of "What will Stimpy eat?"